
By Derek Burk
When you’re building an IPUMS International extract, you almost always have a central topic or question in mind: How is children’s educational attainment influenced by their parents’ education levels? How have migration patterns in Latin America changed in the past few decades? How do age and disability status interact to influence employment?
In other words, you almost always know the main variables you want in your extract. To study education, you’ll need EDATTAIN. To study lifetime international migration, you’ll need BPLCOUNTRY. To study disability and employment, you’ll need DISABLED and EMPSTAT.
Wouldn’t it be great if there was a magic wand that could add all the samples with your variable(s) of interest to your extract with just a flick of the wrist?
If you’re nodding your head in agreement right now, we think you’ll love our new feature: variable based sample selection! It doesn’t involve a wand, but it is a magical way to select samples based on the variables you need.
Enabling variable based sample selection
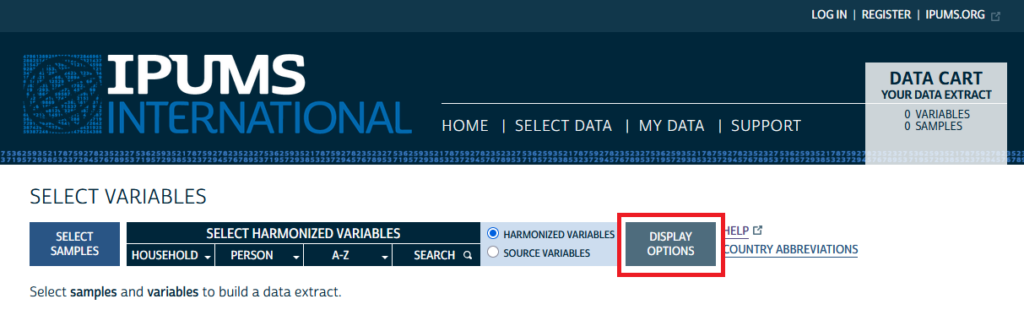
Variable based sample selection is not enabled by default, so to use it, you’ll first need to turn it on. From the top level Select Variables page on the IPUMS International website, click on the Display Options button:
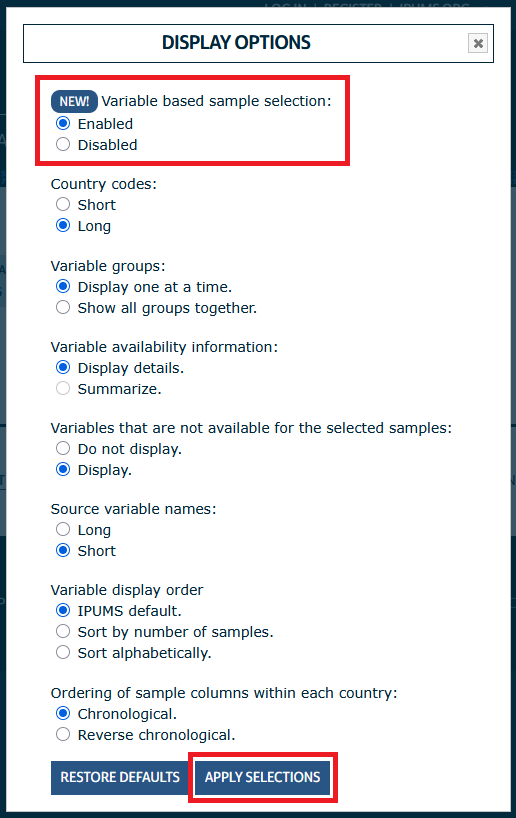
This will call up the Display Options menu. The variable based sample selection feature is listed at the very top of the menu. To turn the feature on, click the radio button next to “Enabled”, then click the Apply Selections button at the bottom.
Selecting samples when you’re browsing variables
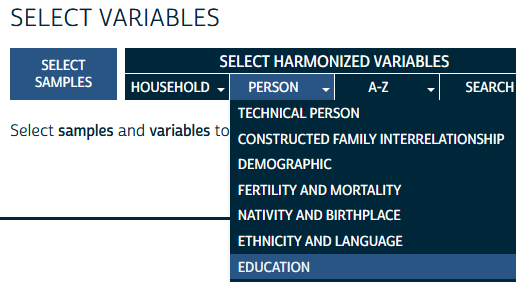
One way to use variable based sample selection is to add samples to your extract while you’re browsing variables. To see this in action, use the variable selection drop-down menu to navigate to a topical group that is relevant to your research. If you’re investigating how children’s educational attainment is influenced by their parents’ education levels, you might start with the Person > Education topical group.
Now that you’ve enabled variable based sample selection, you’ll see a new column on this page with the heading “Add/Remove Samples”, just to the right of the Variable Label column.
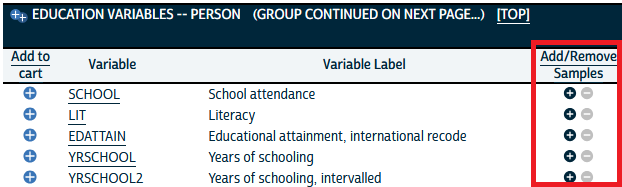
Since you haven’t yet added any samples to your extract, only the plus sign button is active right now. To add all samples that include EDATTAIN to your data cart, click the plus sign button in the EDATTAIN row. This will call up a confirmation window that lists all the samples that will be added to your cart – 592 of them in the case of EDATTAIN!
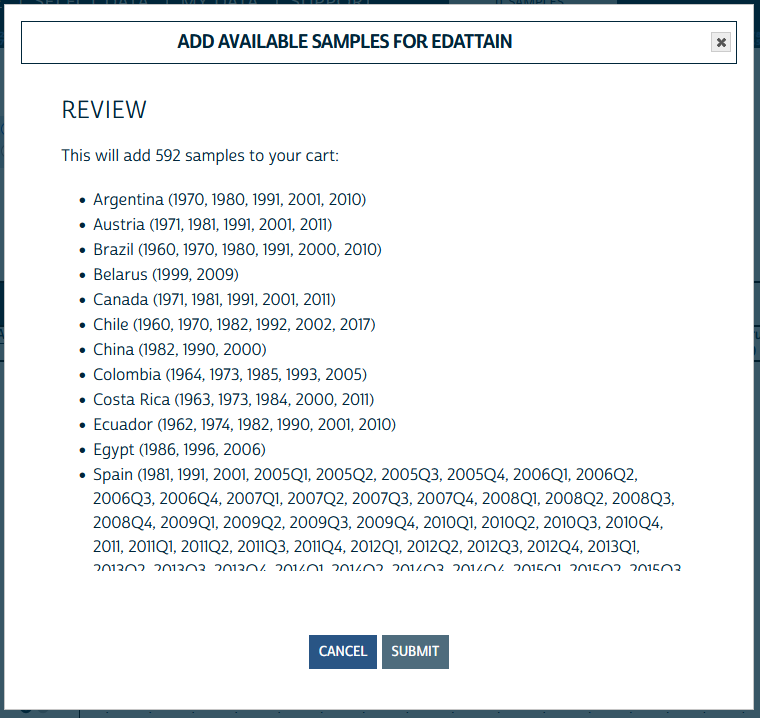
Clicking Submit adds those samples to your data cart, and also adds EDATTAIN if it’s not already in your cart. Now that you have samples in your cart, the minus sign button in the Add/Remove Samples column has turned blue to signal that it is active. While the plus sign button in the Add/Remove Samples column adds all samples to your cart that include a given variable, the minus sign button removes all samples from your cart that don’t include a given variable.
Next, you’ll need a variable that directly reports parental education or a way to link children and parents. Luckily, IPUMS constructs the family interrelationship variables MOMLOC and POPLOC that do the latter. Navigate to Person > Constructed Family Interrelationship to see the Remove Samples functionality in action.
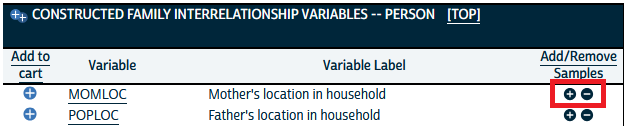
If you click the minus sign button in the Add/Remove Samples column and MOMLOC row, this will remove all the samples in your cart that don’t include MOMLOC. You will again see a confirmation window listing these samples so that you can review what will be removed before completing the action.
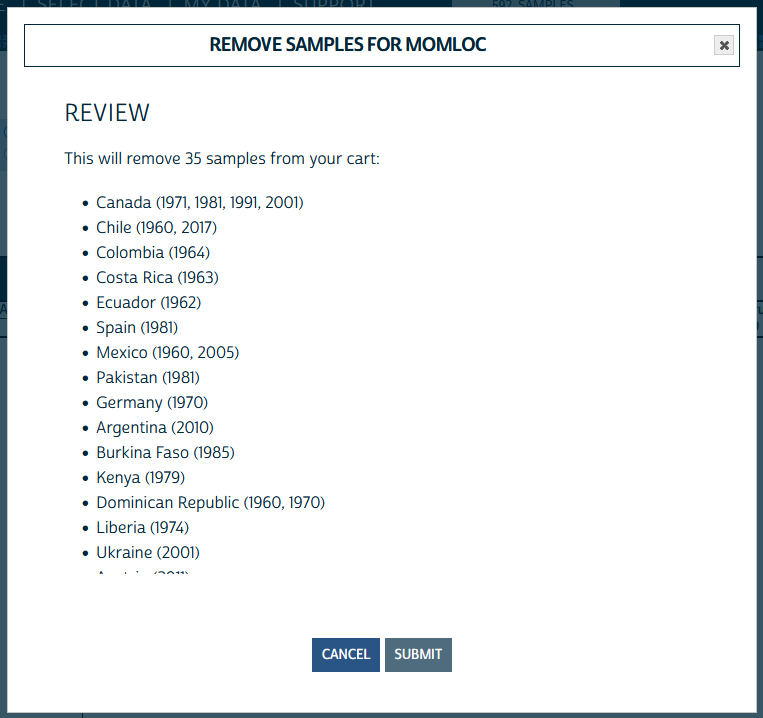
As before, clicking submit will edit the samples in your cart (in this case, removing some of them) and will also add to your cart the variable you used to make the selection (in this case, MOMLOC).
Note that even when you have enabled variable based sample selection, you can still add individual variables and samples to your extract the same way you always have. For example, only 40 of the samples currently in your cart include the harmonized variable INCTOT (Total income), but you can still add INCTOT to your data extract by clicking the plus sign in the Add to cart column on the left side of the variable selection table.

Clicking the plus sign under Add to cart will add that variable to your data extract without changing the samples in your cart, even when you have variable based sample selection enabled. Selected samples that don’t include INCTOT will still be included in your extract dataset, with missing values for that variable. Similarly, you can add individual samples to your data extract by selecting them on the Select Samples page, regardless of whether those samples include the variables you’ve already added to your cart. Thus, variable based sample selection is not meant to be a replacement for regular variable and sample selection, but rather an additional tool to help you more efficiently craft an extract that fits your research needs.
Showing availability on the sample selection page
You can use variable based sample selection while you’re browsing variables, as we’ve just seen, but you can also use it to see a summary of variable availability on the sample selection page. To illustrate, let’s say you now want to explore which samples include variables that would allow you to break your analysis down by subnational geography and parents’ birth country. Add GEOLEV1, GEOLEV2, and BPLCOUNTRY to your extract using regular variable selection (as shown with INCTOT above), then click the Change Samples button to navigate to the Select Samples page.
On the Select Samples page, just above the tabs for viewing samples grouped by region, there is a checkbox labeled “Show Availability”. If you click this checkbox, each sample will be displayed inside a color-coded box that denotes whether it contains all, some, or none of the variables in your cart. As of this writing, 286 IPUMS International samples include all of your selected variables (EDATTAIN, MOMLOC, POPLOC, GEOLEV1, GEOLEV2, and BPLCOUNTRY), compared to 557 that include at least the first three (EDATTAIN, MOMLOC, and POPLOC).
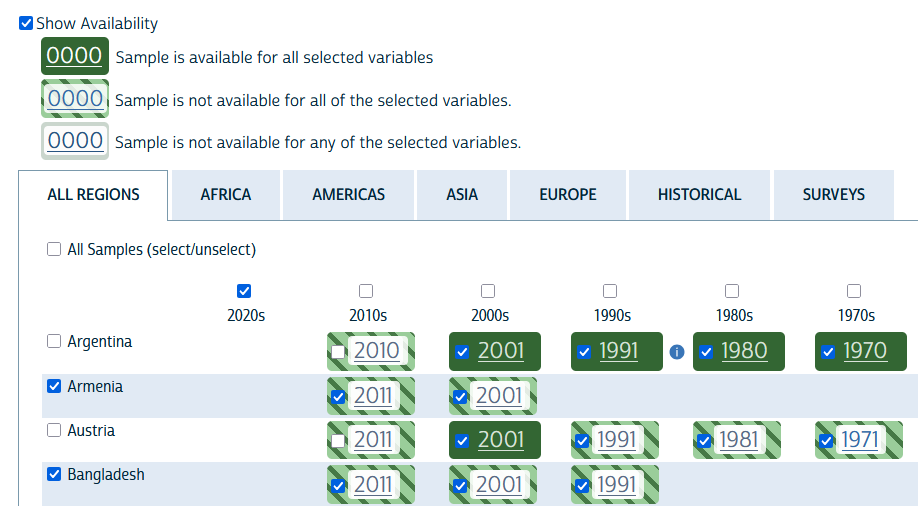
Used in conjunction with the functionality outlined above in the variable browsing view, this color-coding can be helpful in narrowing down your list of samples and variables according to your analytical needs.
One limitation of this view is that you can’t see exactly which variables are available for samples with the striped green color-coding – for example, you might wonder which of your selected variables are available for Austria 2011.
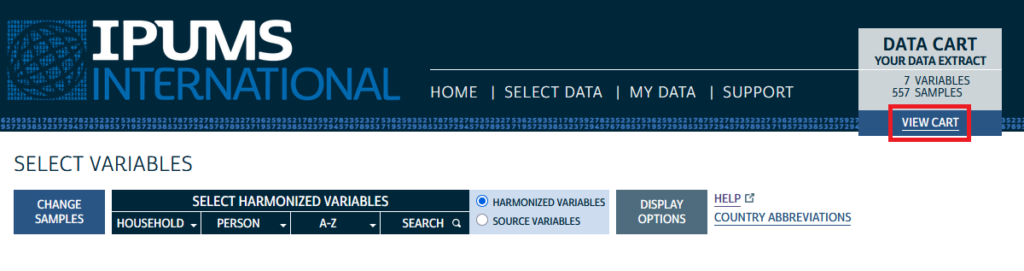
One way to answer that question is to add Austria 2011 to your cart from this view (by checking the box next to the sample year and then clicking the Submit Sample Selections button), then click on the View Cart link back on the Select Variables page to see a table of variable availability for just the variables and samples in your cart.
Once in the Data Cart view, you can see that Austria 2011 includes all of your selected variables except for MOMLOC and POPLOC (Austria 2011 is a sample of individuals not grouped into households, so IPUMS wasn’t able to construct family interrelationship variables for that sample).
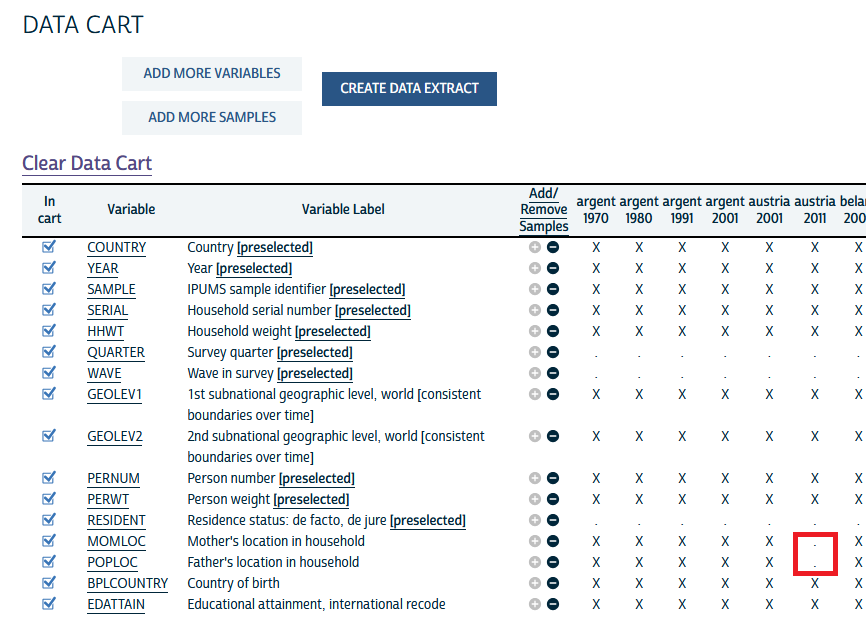
You can also see in the screenshot that variable based sample selection is available right from your data cart! However, within your data cart view, you can only remove samples that do not include a given variable that is already in your cart. To add samples, you will need to return to the main variable browsing page.
Cautions and considerations
As you are exploring this new feature, you may accidentally add or remove a bunch of samples from your cart. In fact, in preparing this blog post, I accidentally removed from my cart all the samples that didn’t include INCTOT – oops! If that does happen, don’t panic! You can always click the Clear Data Cart button on the View Cart page, as shown in the screenshot above, to start over from scratch, or you can just repeat the variable based sample selections you applied before to get back to where you were before the mistake.
In my case, after accidentally removing from my cart the 517 samples that include EDATTAIN, MOMLOC, and POPLOC but don’t include INCTOT, I recovered my cart by navigating back to the Education variables group and re-adding all 592 samples that include EDATTAIN (with the plus sign button), then navigating to the Constructed Family Interrelationship variables group and re-dropping (with the minus sign button) the 35 samples that include EDATTAIN but don’t include MOMLOC and POPLOC.
One other caution: this feature allows you to add many samples to your data extract in one fell swoop, but it doesn’t magically enable your computer to actually analyze that much data. The example extract with 557 samples and 17 variables (including the preselected variables) would result in a 70-gigabyte data file containing 893 million person records – you’d need access to some serious computing power to comfortably work with that much data. In many cases, various considerations will lead you to narrow your extract down to fewer samples, but if you do want to conduct analyses across a large number of samples and are short on computing power, you can also take advantage of the Customize sample sizes feature available on the extract submission page to take a random sub-sample of each sample in your extract.
If this new feature sounds useful, we hope you’ll try it out, and as always, reach out to us on the IPUMS Forum or by email (ipums@umn.edu) with any questions or feedback!